

Knowing How to Clean a Vape Device is Important
Your postman delivered your new vape device today, and you just opened the box. Your eyes are wide and excitement fills your entire body. Just look at it… it’s sleek, it’s shiny, it’s the most advanced vape mod on the market and you’ve got that new car feeling. Two months later, your device is dirty and gunky, its performance is lacking, and you’re ready for a new one. You just realized that you don’t know how to clean a vape device. If you’ve owned more than one device, this scenario probably sounds very familiar.
For long-term usage and performance of your vape mod, vape pod kit, vaporizer or vapebox, regular maintenance is key. Additionally, keeping your vape device’s components clean ensures that you get maximum flavour on every hit, and we’re all about flavourful hits! To help you keep your device as new as the day you purchased it, we created this full-scope How to Clean a Vape Device newbie guide.
Anatomy of a Vape Mod and Vape Pod
To follow our vaporizer cleaning tips, you’ll first need to understand the components of your device. A pen-style vaporizer is generally made up of three main components:
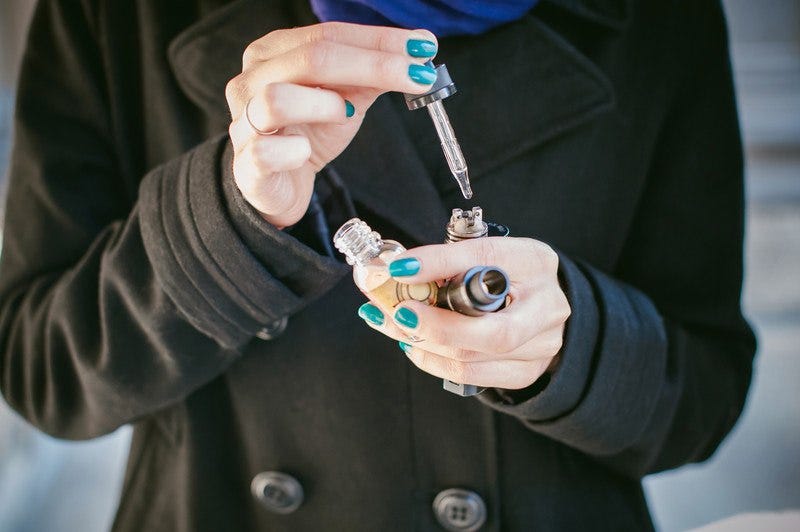
- Vape Tank: The vape device tank holds e-liquid and is typically combined with the atomizer as a single unit.
- Vape Coils: A heating element that converts e-liquid into vapour.
- Vape Pod: In place of a tank with universal threading and a replaceable coil, a vape pod will be propreitary to a specific model and also include either an integrated battery or one designed for a reusable pod.
- Vape Mod or Vape Pod Kit Battery: The power source of the unit. May have voltage and temperature control options. For vape mods, the battery is contained within the housing itself.
- NOTE: Some Vape mods require 18650 batteries, which are sold separately.
Box mods are similar in construction, except that they have a larger housing and more powerful batteries. Due to this increased power, a vapebox often produces more vapour, gives a better throat hit, and enhances vape juice flavours.
When To Clean Your Vape Device
Simply rinsing and cleaning your vape tank is something you’ll want to do each time you change flavours, so that your new flavour isn’t compromised by the last flavour you used. It’s best to also make it a habit of giving your vaporizer a weekly once-over and to clean your device thoroughly at least every few weeks.
Of course, any time your device isn’t giving you the performance that you want, a full-scale vaporizer cleaning with consistent vape pen care maintenance may be good first steps to improve its output.
How to Clean a Vape Tank
We want maximum flavour when we buy new e-liquids, but we’ve all made the mistake of putting new flavours in our tanks and still having the back-flavour of the last e-liquid we’ve used. We love our espresso flavours, but lets face it, the last thing we want is to inhale our new Cosmic Fog Milk & Honey flavour and have a hint of yesterday’s KloudMaster Macchiato tingling at the back of our throats. To avoid this, cleaning your vape tank is recommended. Usually a simple rinse will do, but every now and then, cleaning your vape tank with alcohol will be necessary.
The Simple Rinse:
- Fill a bowl with warm water.
- Detach tank from mod.
- Dispose of any e-liquid remaining in the tank
- Completely disassemble your tank.
- Place tank components into bowl.
- Wash tank components in water until clean. If tank is extremely dirty, a few drops of dish soap will help!
- Dry off each component with a paper towel.
- Let stand and air dry for 10-15 minutes.
- Reassemble tank and device.
The Deep Clean - Cleaning Vape Tank with Alcohol
- Detach tank from mod and dispose of any e-liquid remaining in the tank.
- Completely disassemble your tank.
- High-proof and nonflavoured vodka works best as a solvent to help break down e-juice deposits from the vapebox tank. Dampen a cloth or paper towel with the vodka and scrub any tough areas until the tank is completely clean.
- Wipe and rinse with warm water.
- Let stand and air dry for 10-15 minutes.
- Reassemble tank and device.
How to Clean Vape Coils
No matter how well you clean your device, at some point, you’re going to need to replace your coil. Unfortunately, there’s nothing we can tell you about how to clean vape coils that will bring them back to life. If you wet them, they’ll burn out. Coils have a huge influence on flavour, and the more you vape, the more often you’ll need to change your coil. Don't worry we've a wide range of vape coils to choose from. Changing your coil is simply just another part of successful vape pen care. Here are some signs that your coil may need to be changed:
- It is visually dark, crusted or damaged.
- You are experiencing a “burnt” taste, even after thoroughly cleaning your device.
- Your atomizer is having leakage issues.
- You are experiencing decreased vapour production.
Changing the coil in your vaporizer is relatively simple, but with so many different coil types available on the market, there really is no “one-size-fits-all” way of doing things. Generally however, changing the coil in your vape pen or vapebox is as simple as:
- Remove tank from device.
- Discard any remaining e-liquid.
- Twist the coil to the left to unscrew it from tank.
- Screw in new coil.
- Reattach tank to device.
Pro Vape Maintenance Tips
By now, you know how to clean your vape device thoroughly and how to replace your coil when the time comes. Knowing how to clean your vape pen or vapebox is only one part of successful vaporizer ownership. You will still make mistakes and learn new ways of doing things as you journey from a vape novice to a vaping veteran. To shorten the learning curve, here are some pro tips for the best vape pen care to maximize performance from your device:
-
- Maintain the ideal e-liquid level - Don’t allow your tanks to run dry, make sure there is always enough e-liquid in your tank during operation. Likewise, don’t overfill the tank by adding e-liquid all the way to the top either. Find the optimal filling level for your specific device both for the minimum and maximum amount of vape juice.
- Keep your vape juice in the right environment - Be sure not to expose your e-liquid to any extreme temperatures or leave it in the direct sunlight. Extreme heat will make your vape juice thin out and will increase the likelihood that you will experience leaks or poor vapebox performance.
- Store your vaporizer safely. When not in use, find somewhere safe to store your device to minimize any mishaps. Ideally, purchase a great storage case to store your device when you are travelling or when you will not be using it for an extended period of time.
You now know how to clean a vape device, how to clean a vape tank, how to change a vape coil, and how to maintain your vapebox so that it can be enjoyed for years to come. Follow this guide and you’ll be sure to maximize your vape experience on every hit, and generate the maximum flavour each and every time you change your vape juice. Vape on!
Are you a veteran vaping enthusiast with additional tips for those buying their first device? If so, leave them in the comments below!
Leave a comment
This site is protected by hCaptcha and the hCaptcha Privacy Policy and Terms of Service apply.
Flavored Vapor Products are Not Available for purchase in the state of California